Tuesday, March 31, 2009
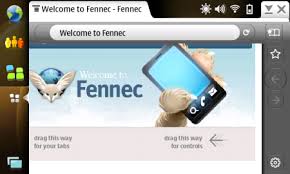
Fennec Beta 1 Release Notes
This is the twelfth development milestone and the first beta release of the mobile version of Firefox, for testing purposes only, intended to:
* get wider feedback on our approach to the user experience
* engage Mozilla community teams, including localizers, and testers
* get feedback from Web developers
* encourage add-on developers to port existing add-ons and invent new ones for mobile
The initial focus of Fennec development was on building a new user experience that reflects Firefox's design principles, adding touch screen support and other interactions appropriate for mobile phones and other handheld devices, while preserving leading features like the Smart URL Bar ("awesome bar") and support for add-ons.
For beta 1, we continued to focus on performance and responsiveness. TraceMonkey, Mozilla's new JavaScript engine, is now included in Fennec, greatly improving performance. Many other performance improvements were made to panning, zooming, responsiveness and application start-up, some of which are listed below.
To help out, visit the Mozilla mobile page to learn about our public weekly meetings, how to find our community on IRC, and more.
These Release Notes provide a "quick start" for the impatient, some highlights of what's included in this version, download and installation instructions, known issues, and frequently asked questions. Please read these notes and the bug filing instructions before reporting bugs to Bugzilla.
Quick start
This release is available for the OS2008 ("Maemo") software platforms that runs on the Nokia N810 Internet Tablets. If you're viewing this on an N810, install Fennec.
Don't have an N810? Don't worry, you can still experiment with Fennec, provide feedback, write add-ons, and get involved by installing a version of Fennec for your desktop PC:
* Windows
* Mac OS X
* Linux
The idea behind releasing the package for PCs is to give people who don't have a Nokia Internet Tablet the ability to localize, experiment and build add-ons. Note: The desktop version of Fennec is not a supported product.
What's in this version?
New for Beta 1:
* TraceMonkey, Mozilla's new JavaScript engine
* Faster application start-up time
* Faster panning
* Faster zooming
* Initial implementation of bookmark folders and bookmark editing
* Support for plug-ins
This builds upon the feature set of the alpha releases:
Easy navigation to Web content:
* Bookmarks, including tags
* Smart URL bar ("awesome bar")
* Tabbed browsing with thumbnail images
* Integrated Web search - built into the URL bar
* Easy access to multiple search engines
Web content:
* Maximize content by auto-hiding controls and URL bar
* Zoom in and out
Security:
* Instant Web site ID ("Larry")
* Password manager
* Popup blocker
* Clear private data
Devices services integration:
* Click on a phone number to initiate a call
* JavaScript API to get device location
Also:
* Searchable download manager
* Preferences pane
* Add-ons manager, including ability to directly find and install add-ons
Installing Fennec
System requirements:
* Nokia N810 Internet Tablet running OS2008 ("chinook" or "diablo")
Installation:
* If you're viewing this on an N810, click here to install Fennec
* Read here for step by step instructions
Install a version of Fennec for your desktop PC:
* Windows
* Mac OS X
* Linux
Tips and tricks
* to use the full screen for browsing, click the button on the left hand side on top of the device (to the left of the -/+ buttons)
* swipe left to expose back/forward/bookmark buttons and the URL bar; swipe right to dismiss them
* swipe right to expose tabs; swipe left to dismiss them
Known issues
* Bug 458741: Allow panning/scrolling in iframes - Websites that display large amounts of content in IFrames, including Google Mail and Reader, will be very hard, if not impossible, to use.
* Plugins may not work in some of the desktop builds.
Give us feedback
* Comment in our newsgroup
* File bugs in Bugzilla. Read these instructions first.
Friday, February 27, 2009
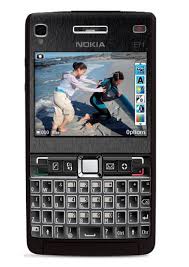
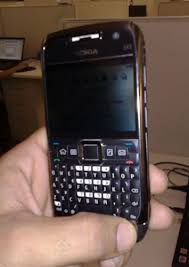
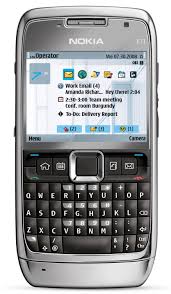
Nokia E71
Smartphone comes in a stylish solid casing which is available in either a white steel coloured casing or a grey steel coloured casing. The style of the handset is solid & slim with a full QWERTY keyboard situated below the high resolution screen. The overall size of the casing is very slim for a 3G Smartphone which measures 10mm in depth, 57mm in width by 114mm in height & its overall weight is 127 grams. The screen is large which measures 2.3 Inches when measures diagonally & provides up to 16 million colours on a QVGA type display. Below the screen the user will find a Navi™ key for smoothly navigating through menus & the full QWERTY keyboard for an easy to use text input method. The E71 comes with a handset lock feature & a remote lock to prevent the user activating any buttons when the handset is not in use.
The Nokia E71 works on a Symbian operating system version 9.2 complete with series 60 software version 3.1. The Smartphone comes with a built in A GPS navigation system which supports Nokia maps for easy to following navigation maps. The user can enjoy high speed Internet connectivity & Internet features on this Internet focused Smartphone which allows the user to browse the Web like they would do on their home or office PC. The E71 supports XHTML & HTML Web browsing complete with a Nokia mini maps feature. The 3G Smartphone comes with easy to use call features which allows the user to enjoy a conference call with up to six contacts at a time, a hands free call over the handsets loud speaker system or a voice over IP call over the Internet. A built in phone book allows the user to store contacts details complete with an image. The user can store all their contacts numbers & information in one place which allows the user to manage their contacts easily. The handset comes with everyday call features such as call divert, call hold, call timer & a call waiting feature. A built in calendar feature on the Nokia E71 allows the user to plan events & meeting easily to stay on top of arrangements & commitments. The E71 comes with an alarm clock function & a clock which can be displayed in either analogue or digital format.
The standby times vary on the handset depending on the user's network selection but the user can enjoy up to 408 hours of GSM standby time from a fully charged battery. The Nokia E71 is a 3G HSDPA technology handset which allows the user to experience high speed Internet & connectivity on this highly capable 3G Smartphone. The handset supports popular connectivity options which include a USB cabled connection, Bluetooth® wireless connectivity & an infra red connection. The user can connect their 3G Smartphone to other compatible devices using a connectivity method to suit the user's needs. The Nokia E71 supports WLAN Wi-Fi technology which allows the use to connect to either a local WLAN or hotspot to enjoy a wireless connection to the Internet. The handset comes with 110 megabytes of built in memory & has a memory card expansion slot which supports up to 8 gigabytes of external memory. The user can enjoy roaming Worldwide with their new 3G Smartphone as the phone covers four GSM networks & WCDMA but the coverage is dependent on the users chosen network provider.
A built in 3.2 megapixel digital camera function allows the user to enjoy capturing still images with the help of many high quality camera & imaging features. The camera comes with a built in auto focus feature, LED flash, CMOS sensor & a digital zoom. The user can change many settings to suit their imaging needs allowing the user to gain the best possible finish when taking a picture. The Smartphone comes with a flash mode features with automatic, on, off & red eye settings, capture modes which include a still, sequence, self timer & video settings. The camera also works as a video recorder which allows the user to capture moving video footage on their handset. The video recorder comes with a digital video zoom which allows the user to get up closer to their subject & comes with many settings & features to ensure a quality video recording is captured every time. The user can also enjoy playing videos & streaming videos on the Nokia E71 on the high resolution screen for a DVD quality viewing experience.
An integrated music player allows the user to enjoy downloading, transferring & playing music in many popular music formats. The E71 supports MP3, WMA, AAC, AAC+ & eAAC+ music playback formats & the handset provides a high quality sound experience for the user to enjoy from their mobile Smartphone. The user can record music & sound using the built in sound recorder. The user can enjoy tuning into their favourite radio station on the built in radio feature to enjoy a new listening experience. The Nokia E71 supports video ringing tones & MP3 type ringtones which the user can change to suit their taste & style. The 3G Smartphone comes with easy to use messaging services which allow the user to communicate with others via email, text message, multimedia message as well as making a call. The email service on the E71 supports email attachments & provides the user with a mobile service similar to the emails service on the user's home or office PC. The user can use the built in text to speech message reader to hear their messages out loud over the handsets speakers. The Nokia E71 is a slim & stylish 3G Smartphone packed full of easy to use communication & entertainment features & will keep the user on the move organised.
Saturday, January 24, 2009
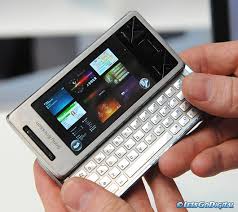
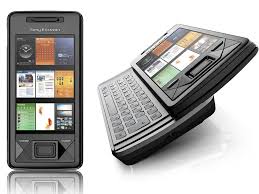
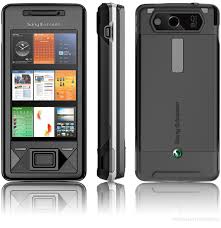
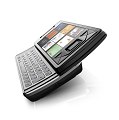
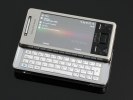
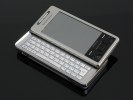
Sony Ericsson XPERIA X1
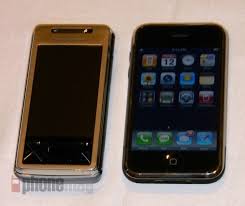
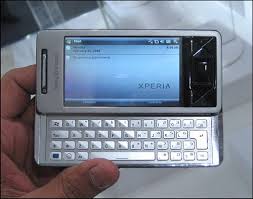
There's a lot to fall for in Sony Ericsson XPERIA X1. Possibly the hottest looker of a PocketPC is also heavy on skill. Heavy enough to not just scratch out a living as a one-hit-wonder but aim for the WinMo top.
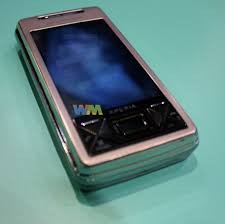
The extra solid metal looks, gorgeous screen and the right pinch of novelty called XPERIA panels look to us as good enough reasons for the X1 to be hyped and romanticized. By the way, romance or not, Sony Ericsson and HTC have hit their perfect shape with that one.
The XPERIA X1 is surely the most eagerly anticipated device in the world of Windows Mobile. Getting our review out was surely quite a wait too, we know. Better late than ever, as some folks say. We'll still have our say 'cause for the XPERIA it's a load of high expectations to live up to.
Sony Ericsson XPERIA X1 official photos
Key features:
- Quad-band GSM/GPRS/EDGE support plus HSDPA 7.2Mbps
- 3-inch 65K-color WVGA touchscreen
- Qualcomm MSM7200 528 Mhz CPU and 256 MB DDR SDRAM
- 3.15 MP auto focus camera with VGA video recording
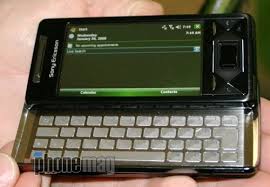
- Four-row full QWERTY slide-out keyboard
- Wi-Fi and built-in GPS receiver with A-GPS
- X-Panels interface
- Optical trackpad
- Exquisite and solid metallic body
- Standard miniUSB port and Bluetooth v2.0 with A2DP
- microSD memory expansion
- FM radio with RDS
- 3.5mm standard audio jack
- MS Office Mobile document editor
- Opera 9.5 web browser
- Excellent video playback performance
- Superb audio quality
Main disadvantages:
- Body is a bit on the bulky side
- User interface is hardly thumb-optimized
- Mediocre camera performance
- No built-in accelerometer
- Poor display sunlight legibility
- Records low quality VGA@30fps video in 3GP format
- No TV-out port
- No full Flash support for the browser (hence no full-featured YouTube)
The XPERIA X1 is one of the best-equipped Windows Mobile devices to ever set foot on the market. But hey, is it not the most elaborate and charismatic PocketPC too? As to skills, the high-res 3" screen and the full QWERTY keyboard seem the most important parts of its magnificent ammo though its processing power is not to be neglected either.
Sony Ericsson XPERIA X1 in our office
Many devices find their identity in standing up to a rival. The XPERIA though is fatefully bound to always have one foot on alien ground. The haunting name for the X1 is HTC - manufacturer and main competitor.
As you probably guessed by yourselves the main alternative to the XPERIA X1 is HTC Touch Pro. It has a smaller screen than the XPERIA X1 and features a slightly lower resolution. In addition it is heavier and, if we were to be asked, not nearly as hot as the XPERIA.
However, the QWERTY keyboard of the Touch Pro is well ahead of what the X1 has to offer. The Touch Pro accelerometer and active magnetic stylus are small but nice touches that add to its allure. There are other advantages too, but we'll try to list them in the dedicated chapter of this review.
Furthermore, the Touch Pro had a nice two-month advantage since it hit the shelves back in August and this could be quite decisive for the sales. After all two months is quite a long time in the world of mobile phones, isn't it?
Let's not waste any more time now and get rolling with the actual review of Sony Ericsson XPERIA X1. Unboxing is this little jump ahead.
Step-by-Step Guide to Unlock iPhone 3G
The iPhone dev team released the much awaited software solution to unlock iPhone 3G so that users can use any GSM carrier's SIM, a perfect New Year gift for all those waiting to unlock their iPhone 3G.
Here is a detailed step-by-step guide to unlock iPhone 3G using Dev team's yellowsn0w application.
Some important points to note before we start:
- Hacking your iPhone could void its warranty.
- Dev team's yellowsn0w application is still in beta and has not worked for all iPhone 3G users but they are working hard to fix the issues and have been releasing new versions of their application.
- Since one of the important requirements to unlock iPhone 3G is to upgrade to iPhone firmware 2.2 (as it exclusivley works with baseband firmware 02.28.00 which comes bundled with firmware 2.2), you need to be aware that iPhone firmware 2.2 breaks Turbo SIM (in case you are using it) - the hardware method to unlock iPhone 3G so if Dev team's software method which is still in beta does not work you might not be able to use your iPhone 3G.
- This step-by-step guide is exclusively to unlock iPhone 3G. We haven't tried it with the 1st generation iPhone. We would sugges you use QuickPwn to unlock the 1st gen iPhone.
- The current version of yellowsn0w does not support SIMs with PIN enabled. So please disable any PIN you may have on that SIM before using this guide. The Dev team are currently working to support SIMs with PIN so this is a temporary limitiation.
- If you want to know if Dev team's unlocking solution has worked for your carrier, please check the Yellowsn0w report.
Preparatory steps before unlocking your iPhone 3G:
- Dev team's unlocking solution works exclusively with baseband firmware 02.28.00 which comes bundled with firmware 2.2, so you will need to upgrade your iPhone 3G to iPhone firmware 2.2 without preserving its baseband and jailbreak it. You can check your firmware and modem firmware(baseband) versions via Settings->General->About and look for Version and Modem Firmware. iPhone 3G firmware Version should be 2.2 (5G77) and Modem Firmware should be 02.28.00.
- You need to first jailbreak your iPhone 3G to unlock it. You can checkout this simple step-by-step guide to jailbreak iPhone 3G using QuickPwn for Mac users or this step-by-step guide to jailbreak iPhone 3G using QuickPwn for Windows users.
Once your iPhone 3G running iPhone firmware 2.2 (with baseband firmware 02.28.00) is jailbroken, you are ready to unlock iPhone 3G.
Unlock iPhone 3G using yellowsn0w:
- Launch Cydia from your iPhone 3G's home screen.
- You need to add the source of the yellowsn0w application. So tap Manage, one of the tabs at the bottom and then tap Sources.
- Tap the “Edit” button on the top-right corner of the screen.
- Then tap on the “Add” button on the top-left corner of the screen.
- You’ll be prompted to add a Cydia/APT URL. Enter http://apt9.yellowsn0w.com/ as the source URL for the yellowsn0w application and then tap the "Add Source" button.
- Once the source has been added press the "Return to Cydia" button at the bottom of the screen.
- Then tap the "Done" button at the top-right of the screen. This completes the steps to add the source for the yellowsn0w application so you can install it.
- Tap on the apt9.yellowsn0w.com source that was just added from the list of sources.
- Tap on apt9.yellowsn0w.com again from the list of packages.
- You will get an option to install the yellowsn0w application. Tap the "Install" button on the top-right corner of the screen.
- Tap the "Confirm" button on the top-right corner of the screen.
- This will install the yellowsn0w application, you will see the progress on the next screen and the "Return to Cydia" button will come up once installation is complete.
- Tap on the "Return to Cydia" button and press the "Home" button on your iPhone 3G to go back to the home screen.
- You need to reboot your iPhone 3G so that the yellowsn0w application which is a small daemon is launched on boot up. Press the “Sleep” button and hold it until you see the “Slide to power off” message. Then slide to switch off the iPhone.
- Once your iPhone 3G has shutdown, insert the desired SIM card and restart your iPhone 3G.
- Once your iPhone boots up and you see the “Slide to Unlock” screen, wait for around 10 to 15 seconds (may be more) to see if your iPhone 3G picks up the carrier signal.
- The Dev team has reported that there is a known issue with SIM cards that have STK (SIM Toolkit) application menus. So if your iPhone 3G doesn't pick up the carrier signal after reboot then try to try to pull out the SIM card and re-insert it, wait for another 10 - 15 seconds and see if your iPhone 3G picks up the signal of the carrier.
If it does then you have successfully unlocked your iPhone 3G.
Some Tips to unlock iPhone 3G if the above procedure does not work:
If the above guide did not unlock your iPhone 3G, then try some of the workarounds mentioned below as it has helped some readers to successfully unlock their iPhone 3G.
Method 1 (via Hackint0sh):
- Airplane mode on.
- Airplane mode off, you should see "searching" and should pick up the carrier's signal.
Method 2 (via Hackint0sh):
- Launch Moble terminal app (you can install it via Cydia).
- Type yellowsn0w -r wait for a moment 10 sec
- Type yellowsn0w -c wait for a moment 10 sec if you get NO SERVICE wait until u get 5 dot and run it again if you don't encounter NO SERVICE just run next command
- Type yellowsn0w -r
- Type yellowsn0w -a if you get busy message in under 15 sec and don't see NO SERVICE it's unsucesfull and you have to do -r and -a again until it loads to NO SERVICE and wait untill it changes to 5 dots and wait for 10sec
- Airplane mode on (keep it in that mode for more than 10 seconds)
- Airplane mode off, you should see "searching" and should pick up the carrier's signal.
If that didn't help:
- Type yellowsn0w -r once and after 5 sec wait 1 min.
- Airplane mode on (keep it in that mode for more than 10 seconds).
- Airplane mode off, you should see "searching" and should pick up the carrier's signal.
Note: Ignore the Unknown message (0xe3ff8000), the command still works even if you get it.
Method 3:
This was suggested by Anton, one of our readers (Thanks Anton!)
- Install BossPrefs via Cydia.
- Disable all Functions with BossPrefs (don't worry if you can't disable EDGE)
- Reboot your Phone with BossPrefs (not in the normally way - important!)
- Wait 1.30 min when you see the Lockscreen.
- Take out your Sim and re-insert it.
- Wait a moment (30 seconds).
- Go on Settings and Turn on the Airplane mode (keep it in that mode for more than 10 seconds).
- Turn off Airplane Mode.
- Your iPhone 3G should pick up the carrier's signal.
Method 4 (via YouTube, user reda92):
- Reset Network Settings. 99% of your success rate will depend on this. (You can find this in settings - general and to the bottom you'll see a "reset" menu in which you can find this)
- Reboot your iPhone
- Wait a little over a min.
- Remove your SIM card and re-insert it back in
- Wait 30 sec.
- Turn on Airplane mode and wait 10 sec. (This is important as well)
- Turn of Airplane mode, you should see "searching" and should pick up the carrier's signal.
If these workarounds did not help unlock your iPhone 3G, then report the problem to the Dev team using this link.
Update (Jan 7th, 2009):
Dev Team have updated their yellowsn0w app to unlock iPhone 3G. It fixes even more problems.
Please don't forget to drop us a line to tell us if you were able to successfully unlock your iPhone 3G using this guide or the workarounds. If you have any tips for fellow readers don't forget to mention them in the comments as well.
Jailbreak App - Lockdown Allows you to Password Protect your iPhone Apps
Its amazing that even after a year and half of iPhone's launch, it still draws attention, I have friends who want to check out my iPhone 3G. I have no problems with that, but the concern I usually have is that I don't want them to access some of the iPhone apps such as iPhone's Mail App or maybe tomorrow an iPhone App which has my bank account details etc.
Thankfully I stumbled upon a jailbreak iPhone app aptly named Lockdown which protects access to iPhone apps to address my paranoia.
Call me paranoid, but I have waiting for Apple to release a feature which gives me the ability to password protect an iPhone app or apps just the way you can set a passcode to gain access to iPhone's home screen.
iPhone app - Lockdown meets that requirement perfectly. It gives you the ability to password protect your iPhone apps.
The user interface of the iPhone app is quite simple. You need to first set the safety word which will come into picture if you have forgotten the master password. You need to then set the master password which can be used to unlock an application.
Once that is done, it provides you with an option to either:
- Lock All Applications
- Unlock All applications (applicable only if you have locked any application)
It also provides you an option to lock System Applications individually such as iPhone's Mail App, Contacts App etc or iPhone apps that you have downloaded for the App Store.
Interestingly jailbreak iPhone apps show up under System Apps. You can tap on any of the applications which prompts you to either Lock or Unlock the application, you can tap on "Lock" to password protect the App or "Unlock" to remove the password protection for an iPhone app.
So the next time you try to launch an iPhone app that you have locked, it will prompt you for the master password that you had set. After you have entered the password you need to tap on the "Launch" button to launch the locked iPhone app (assuming that the password entered is correct). I would have preferred the functionality similar to iPhone's passcode feature so that the iPhone apps launch immediately after entering the passcode rather than the additional step of tapping on the "Launch" button.
As you can see its a simple app that allows you to lockdown access to an iPhone app or apps. You can install Lockdown for free on your jailbroken iPhone via Cydia.
The developer has provided the following warning that you should remember without fail before upgrading to a new version of Lockdown:
"If you are upgrading, make sure you unlock your locked apps before upgrading or you will not be able to do so ever."
If you are paranoid about security, I would also recommend you to read the security tips to keep your iPhone secure.
What do you think about Lockdown? Let us know in the comments.